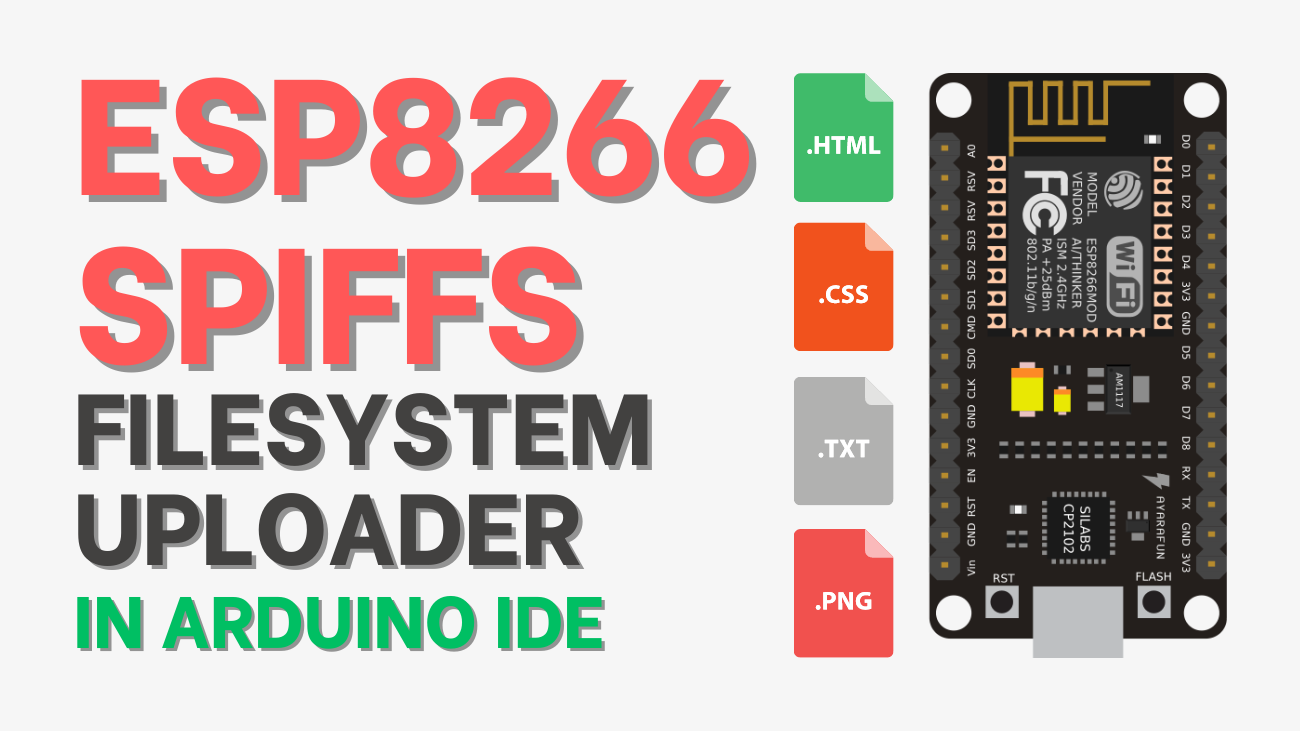
The Serial Peripheral Interface Flash File System (SPIFFS) is included in the ESP8266. SPIFFS is a small filesystem designed to create files for microcontrollers using flash memory. Using an Arduino IDE plugin, this article shows how to simply install ESP8266 SPIFFS filesystem uploader in Arduino IDE.
SPIFFS is presently deprecated and may be removed in future ESP8266 core releases. LittleFS is recommended in its place. LittleFS is actively developed, supports directories, and is quicker for the majority of tasks. Instead, follow this tutorial: In the Arduino IDE, install the ESP8266 NodeMCU LittleFS Filesystem Uploader.
Introducing SPIFFS
SPIFFS allows you to access flash memory like you would with a normal filesystem on your computer, although it is simpler and more restricted. Read, write, close, and delete files are all possible. Because SPIFFS does not support folders, all data is kept in a flat structure.
Using SPIFFS with the ESP8266 board is especially useful to:
- Create configuration files with settings.
- Save data permanently.
- Save images, figures, and icons.
- Save HTML and CSS files to build a web server.
- Create files to save small amounts of data instead of using a microSD card.
- And much more.
In most of our web server projects, we've written the HTML code right on the Arduino sketch as a string. You may use SPIFFS to write HTML and CSS in separate files and store them on the ESP8266 filesystem.
Installing the Arduino ESP8266 Filesystem Uploader
By writing your code in the Arduino IDE, you may create, save, and write files to the ESP8266 filesystem. Because you'd have to type the contents of your files into the Arduino sketch, this isn't particularly useful.
Fortunately, there is an Arduino IDE plugin that enables you to upload files from a folder on your computer straight to the ESP8266 filesystem. This makes working with files quite simple. Let's get it installed.
First, make sure you have the latest Arduino IDE and the ESP8266 add-on for the Arduino IDE installed. To install the add-on, follow the next tutorial:
Installing ESP8266 Board in Arduino IDE (Windows, Mac OS X, Linux)
Follow the next steps to install the filesystem uploader:
1) Go to the releases page and click the ESP8266FS-X.zip file to download.
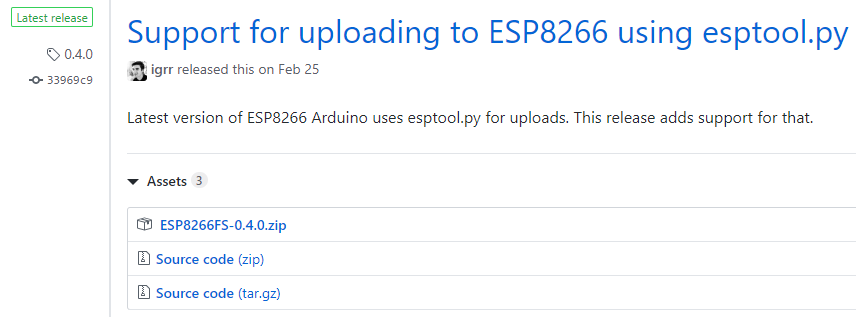
2) Go to the Arduino IDE directory and open the Tools folder.

3) Unzip the downloaded .zip folder to the Tools folder. You should have a similar folder structure:
<home_dir>/Arduino-<version>/tools/ESP8266FS/tool/esp8266fs.jar
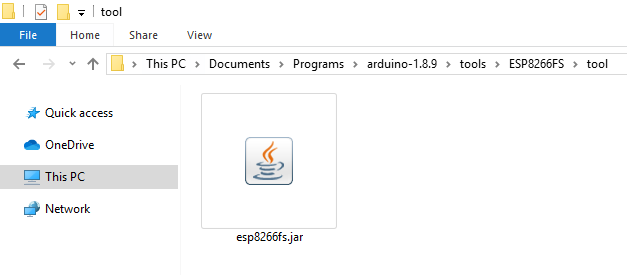
4) Finally, restart your Arduino IDE.
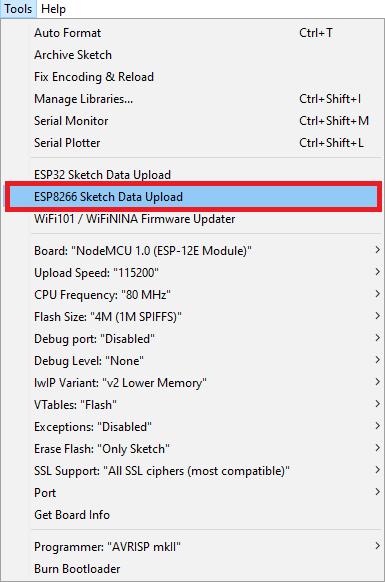
Open your Arduino IDE and select your ESP8266 board to check whether the plugin installation was successful. Check that the “ESP8266 Sketch Data Upload” option is there in the Tools menu.
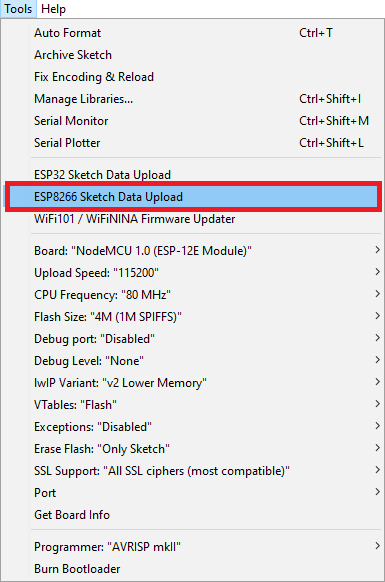
Uploading Files using the Filesystem Uploader
Follow the next instructions to upload files to the ESP8266 filesystem.
1) Create and save an Arduino sketch. You may save an empty sketch for demonstration purposes.
2) After that, open the sketch folder. You may do this by going to Sketch > Show Sketch Folder. The folder in which your sketch is stored should be opened.
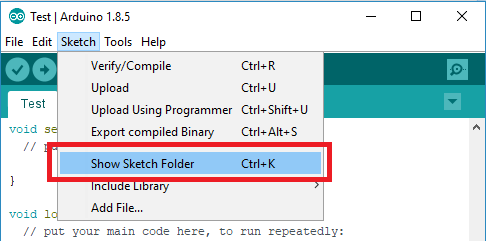
3) Inside that folder, create a new folder called data.
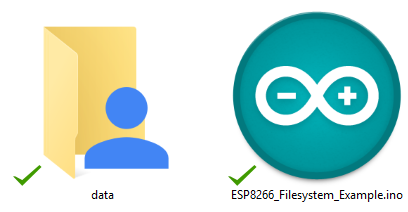
4) The files you want to save to the ESP8266 filesystem should be put within the data folder. Create a. txt file with some text that you call test_example as an example.

5) Select the desired SPIFFS size in the Arduino IDE's Tools menu (the size of your files will depend on this).
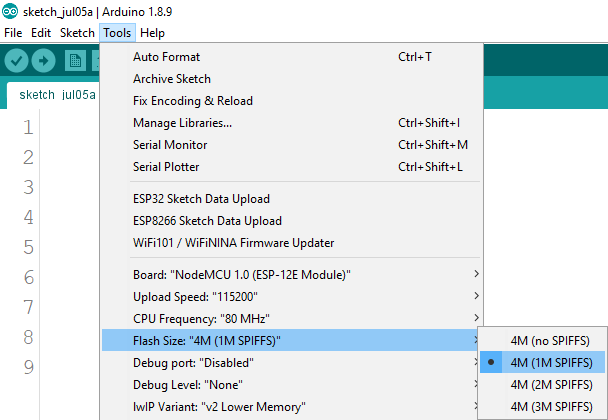
6) You just need to go to Tools > ESP8266 Sketch Data Upload in the Arduino IDE to upload the files.
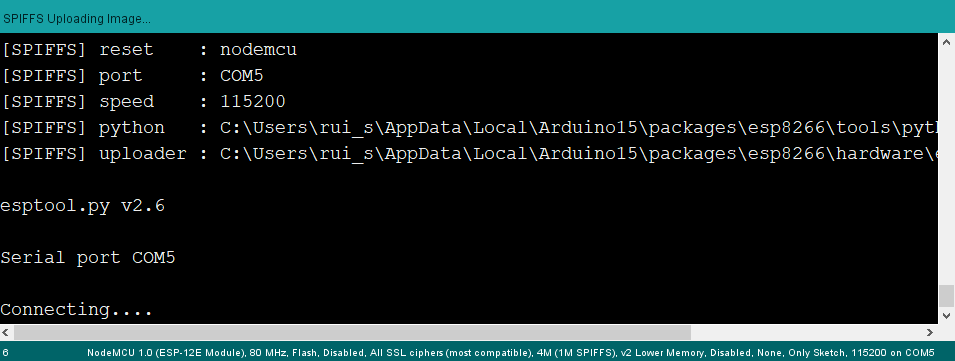
A similar message should get in the debugging window. The files were successfully uploaded to the filesystem of the ESP8266.
Testing the Uploader
Now that the file has been saved to the ESP8266 filesystem, let's just check. On your ESP8266 board, just upload the following code:
#include "FS.h"

void setup() {
  Serial.begin(115200);

  if(!SPIFFS.begin()){
    Serial.println("An Error has occurred while mounting SPIFFS");
    return;
  }

  File file = SPIFFS.open("/test_example.txt", "r");
  if(!file){
    Serial.println("Failed to open file for reading");
    return;
  }

  Serial.println();
  Serial.println("File Content:");
  while(file.available()){
    Serial.write(file.read());
  }
  file.close();
}

void loop() {

}
After uploading, open the Serial Monitor at a 115200 baud rate. Press the “RST” button on the ESP8266. The contents of your.txt file should be printed on the Serial Monitor.
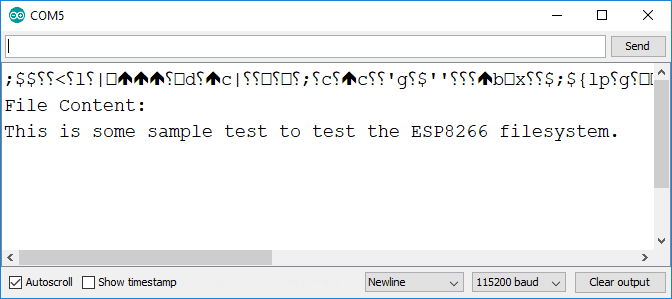
You’ve successfully installed the ESP8266 SPIFFS filesystem uploader in Arduino IDE
Conclusion
One of the simplest ways to upload files to the ESP8266 filesystem is to use the filesystem uploader plugin. You can save HTML and CSS files for creating a web server, photos or small icons, save configuration files, and so on.
We hope you find this tutorial useful. Thanks for reading.


![Official Arduino Starter Kit [K000007] (English Projects Book) - 12 DIY Projects with All Necessary Electronic Components and Instructions - origianl kit by Arduino from Italy](https://m.media-amazon.com/images/I/51fPv6DsjQL.jpg)


