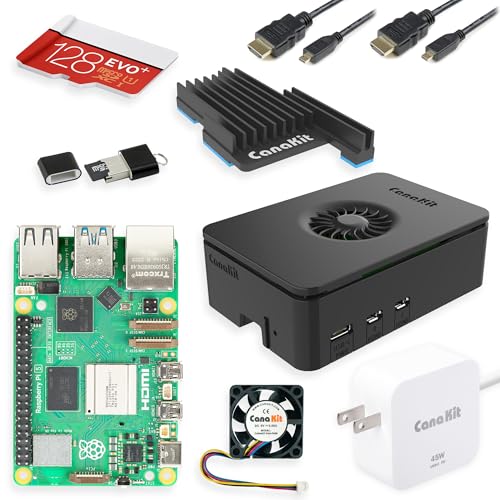
Except for the DC jack, Arduino Nano has practically all of the same features as Arduino UNO. Additionally, the word “Nano” denotes its small size, so although it could contain all the features of the Arduino UNO, there might be fewer of them. It contains a mini-USB connector for programming, just 22 I/O pins, and a CPU that supports 8 bits. The finest feature is that it is a very lightweight board that uses little power, making it simple to connect and program using a Raspberry Pi. In such circumstances, just connect Raspberry Pi to Arduino Nano, and you have a completely portable setup for your project. This means that if you want to create any portable projects using Arduino Nano, you may do so by doing so.
How to Connect Raspberry Pi and Arduino Nano?
The method to connect Raspberry Pi to Arduino Nano is discussed below step by step:
Step 1: Install Arduino IDE
To connect an Arduino Nano to a Raspberry Pi, the Arduino IDE must be installed on the Raspberry Pi.
Since the Arduino IDE is a Java-based program, the user must install the Java package on the Raspberry Pi using the command:
$ sudo apt install openjdk-17-jdk -y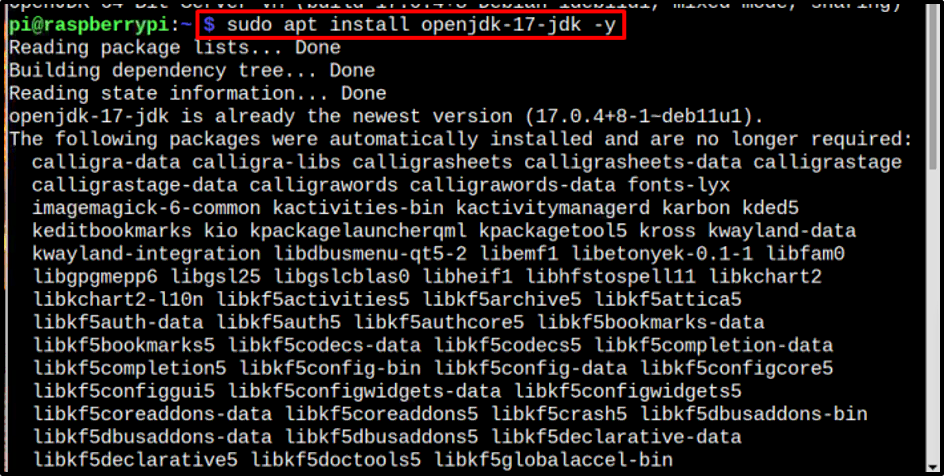
Finally, install the Arduino IDE by running the following command:
$ sudo apt install arduino -y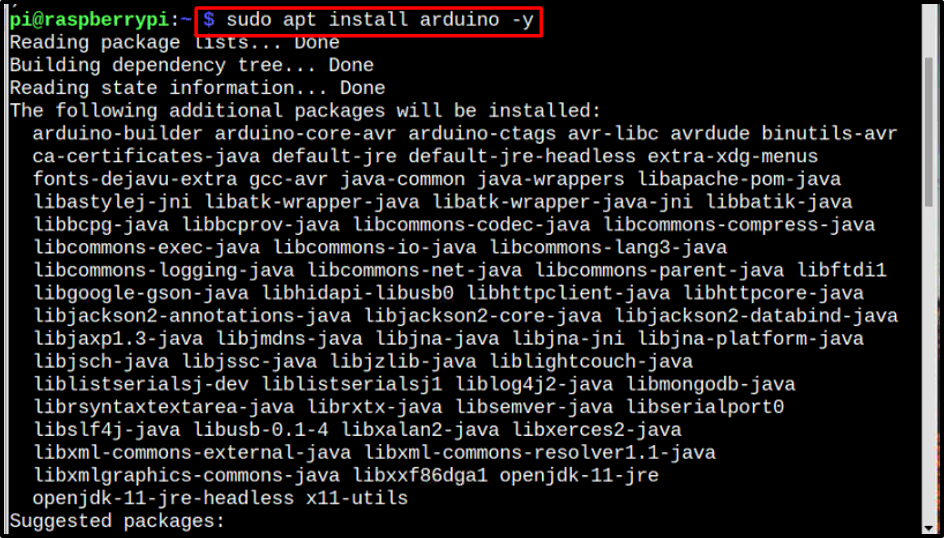
Step 2: Accessing Arduino IDE
There are two ways to open the Arduino IDE once it has been installed. Either use the Programming menu on the desktop to access it:
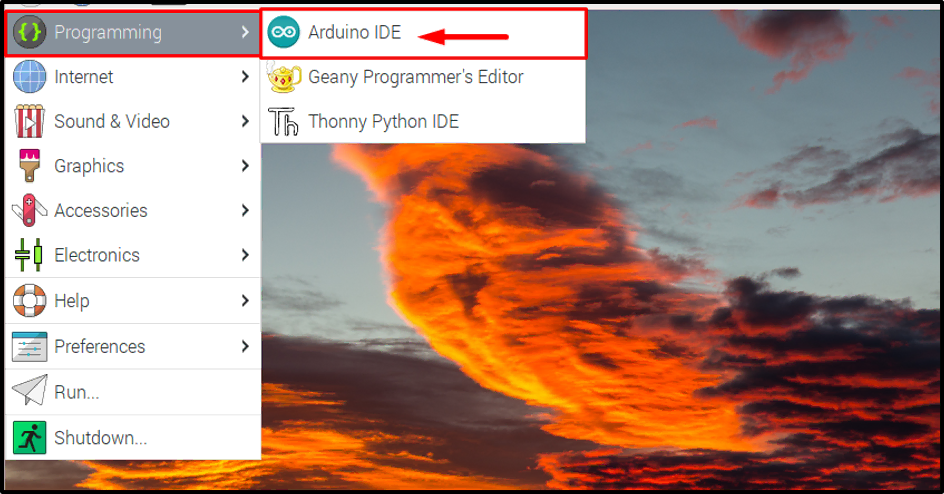
Alternatively, access it by simply typing the “arduino” command into the terminal:
$ arduino
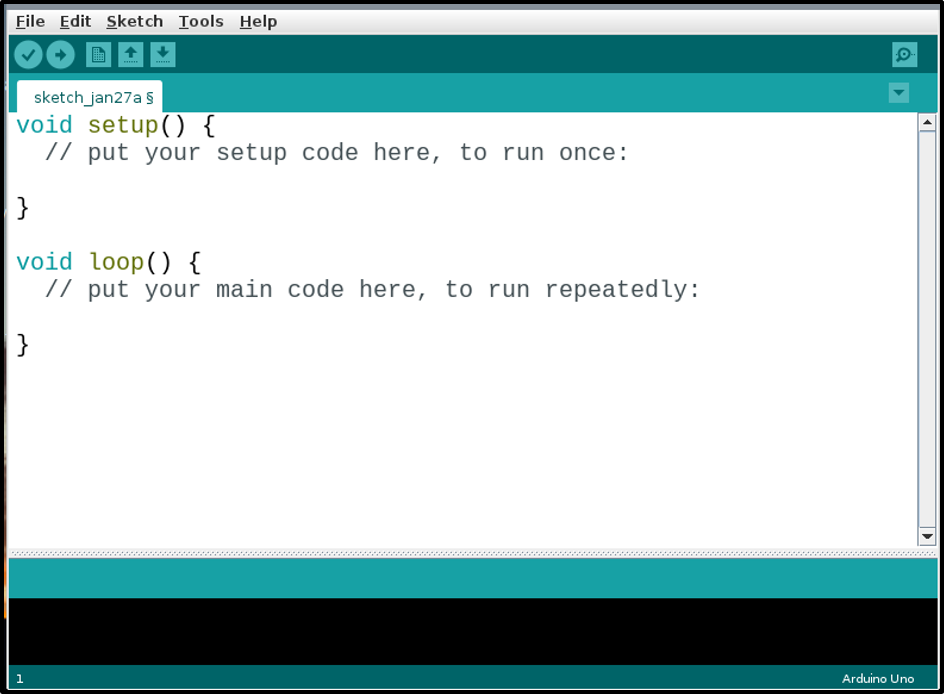
The Arduino IDE interface on the Raspberry Pi will be opened by both of the above actions:
Read More: How to Setup a Raspberry Pi: A Beginner’s Guide
Step 3: Specifying Arduino Board
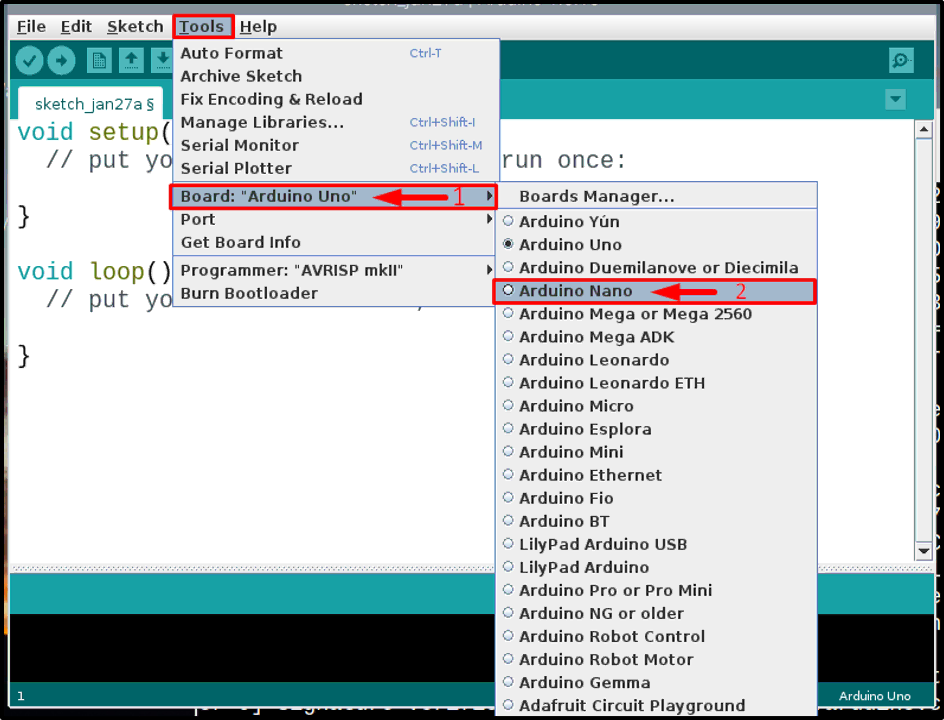
Once the Arduino IDE has been installed and launched, it is time to do the appropriate setup for the nano board by specifying the board in the IDE. To do so, go to Tools >> Board >> Arduino Nano.
Step 4: Creating a Code File
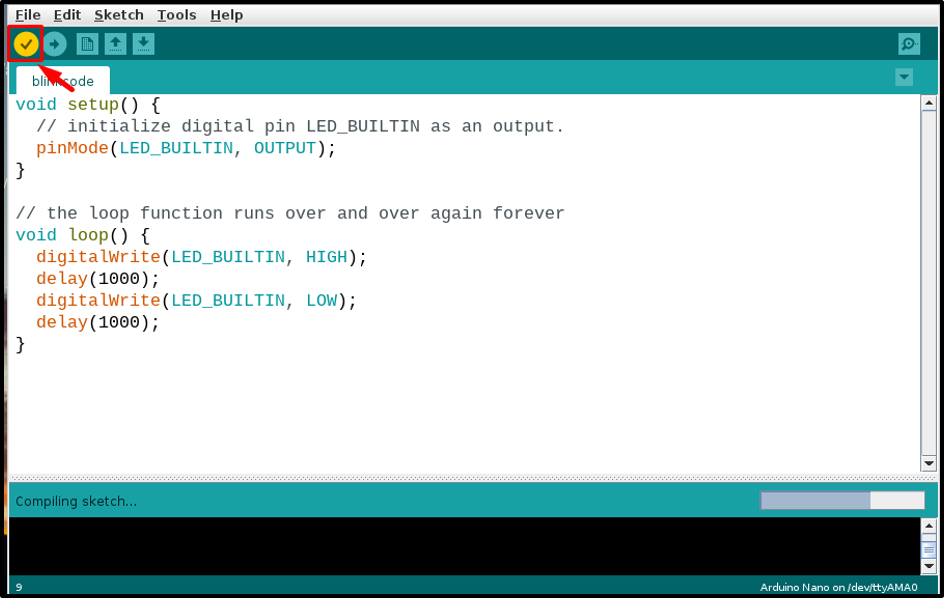
For whatever purpose you wish to program your Arduino Nano, simply write your Arduino code at this point. I've just run an example program to blink the Arduino Nano board's built-in LED with a one-second delay between each on (HIGH) and off (LOW) state, as seen here:
void setup() {
pinMode(LED_BUILTIN, OUTPUT);
}

void loop() {
digitalWrite(LED_BUILTIN, HIGH);
delay(1000);
digitalWrite(LED_BUILTIN, LOW);
delay(1000);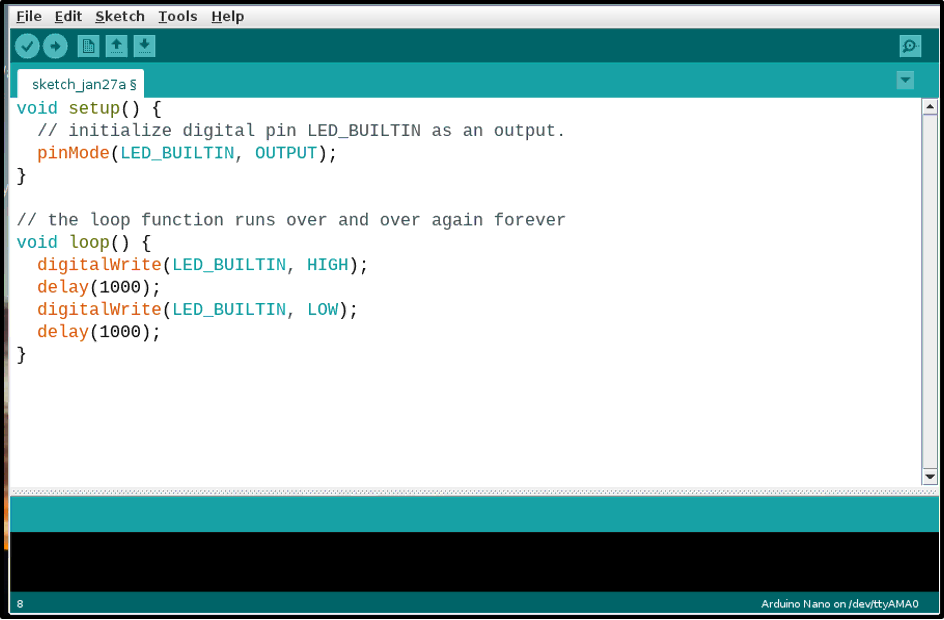
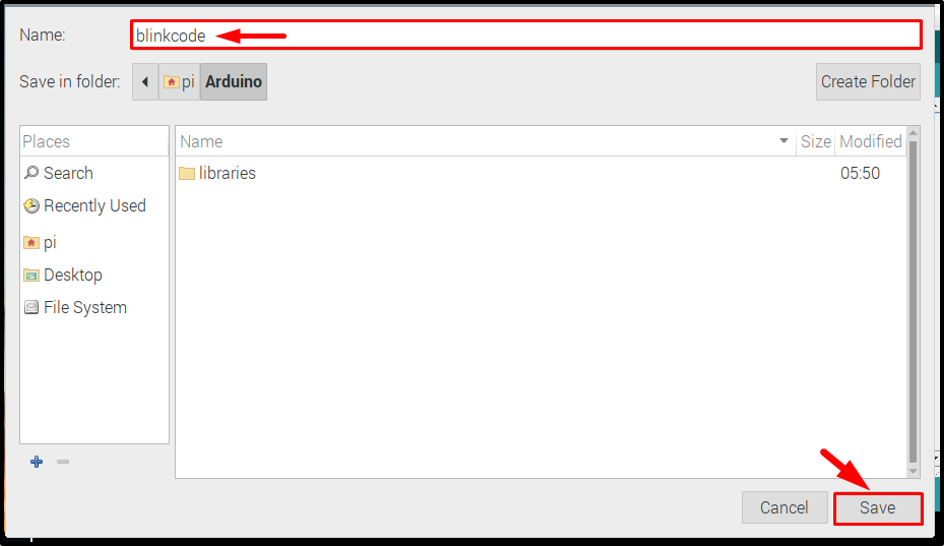
After finishing the code, save the file by clicking the “File” tab and selecting the “Save As” option from the drop-down list.
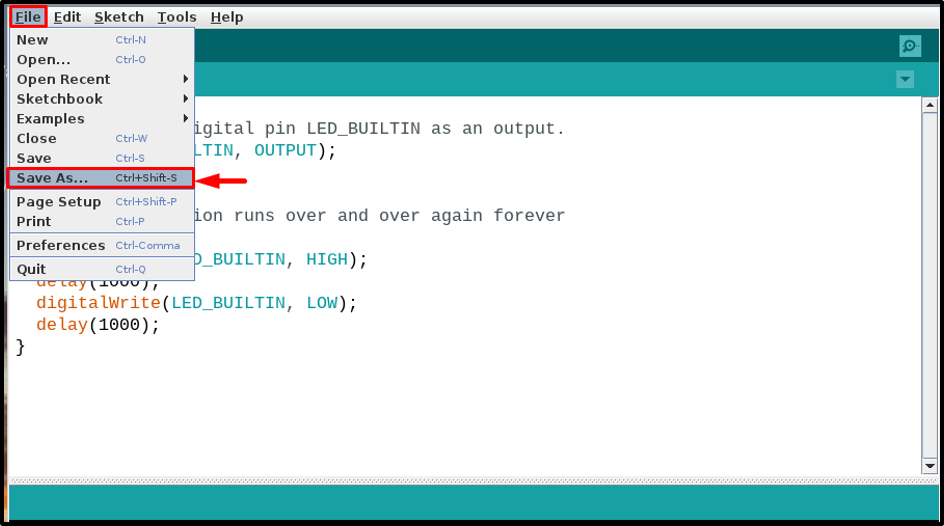
Write a suitable tab name for your file after that; I called mine “blinkcode” since it included a code for an LED to blink. To your code, you may choose. Click the “Save” button when you're done.
Step 5: Compiling the Code
Compile the code to verify that it is correct once the file has been saved.
Read More: How to Install MPlayer on Raspberry Pi
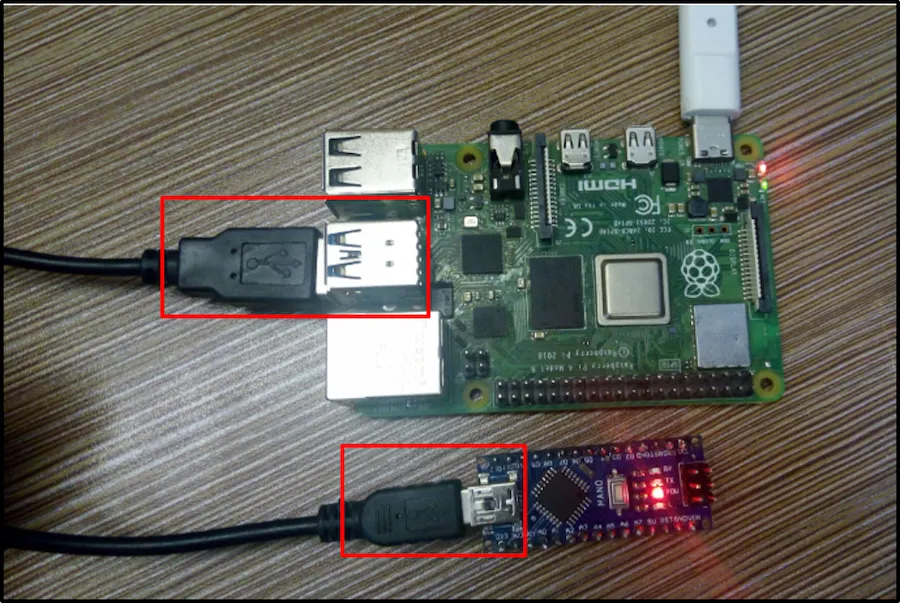
Step 6: Connecting Hardware
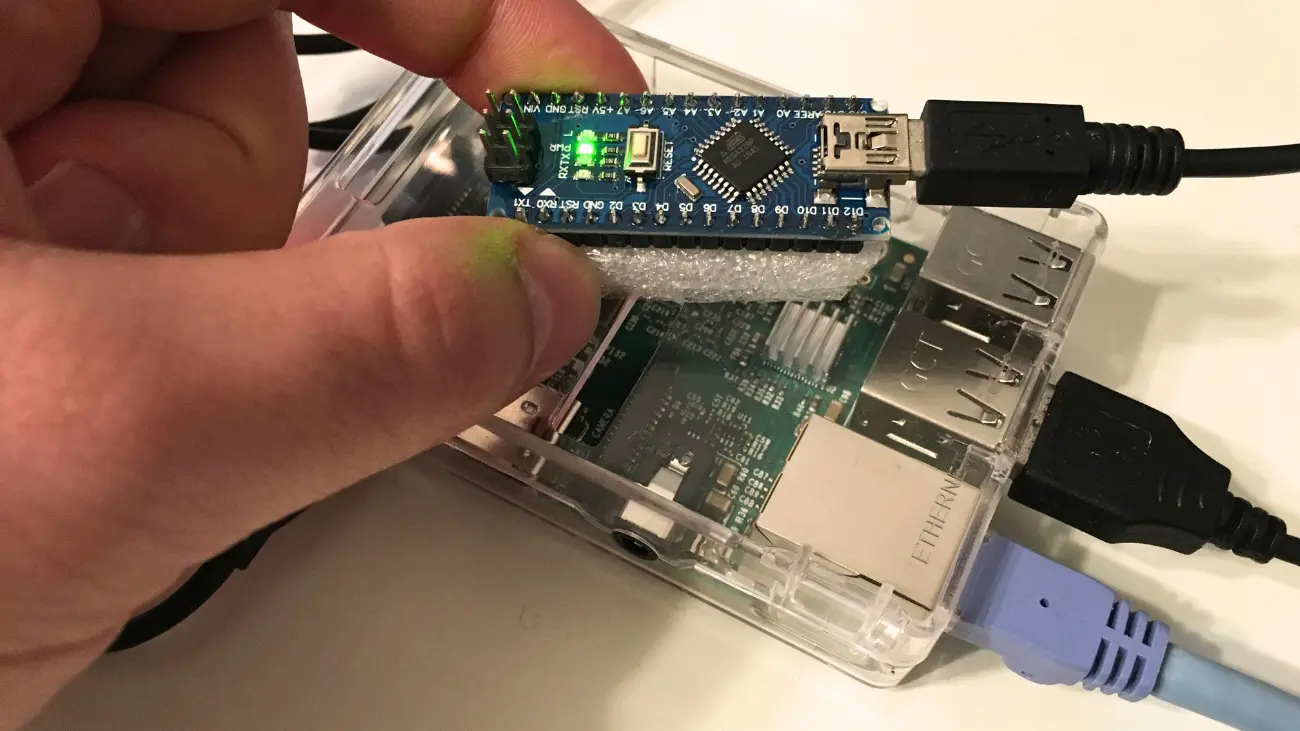
Connect your hardware when the code is ready to upload. Keep in mind that the mini-USB cable connection is used with the Arduino Nano. As shown in the image below, connect Raspberry Pi to Arduino Nano.
Step 7: Selecting Port and Processor
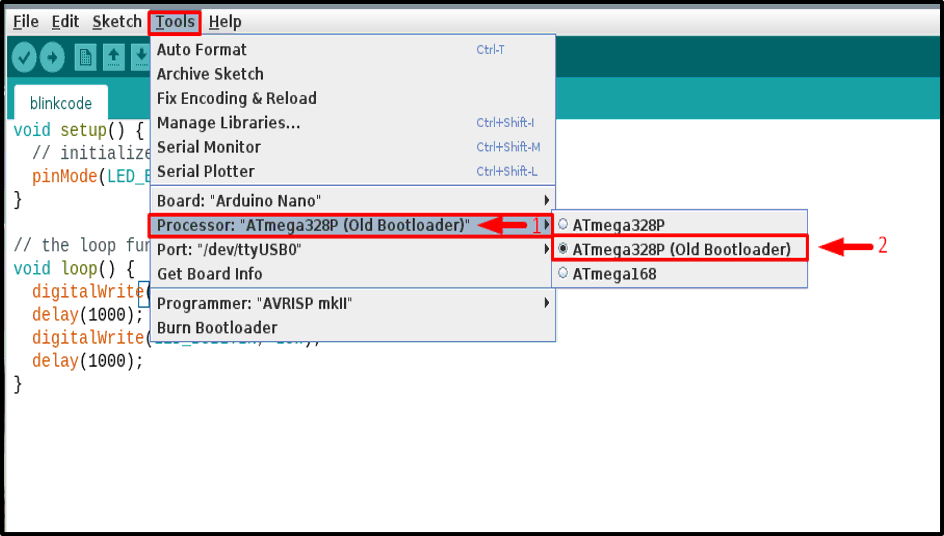
Once the hardware has been properly connected, go to the “Tools” tab and click on the Port option. You should see a port named /dev/ttyUSB0 or any other number after USB, such as /dev/tty/USB1 or /dev/tty/USB2, etc. Choose this port by clicking here:
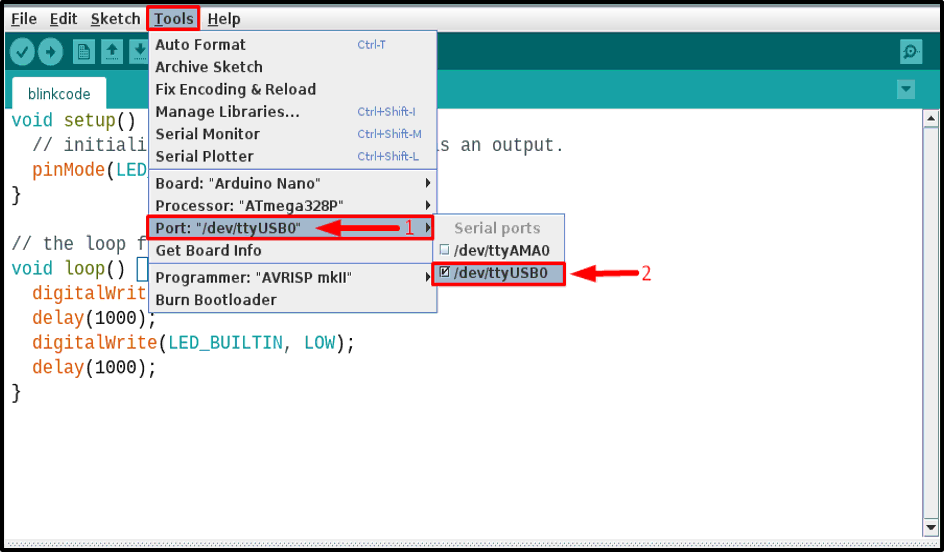
Then, under the “Tools” tab, select “Processor“, since the Arduino Nano's processor is the (Old Bootloader), and click on it:
Step 8: Uploading Code
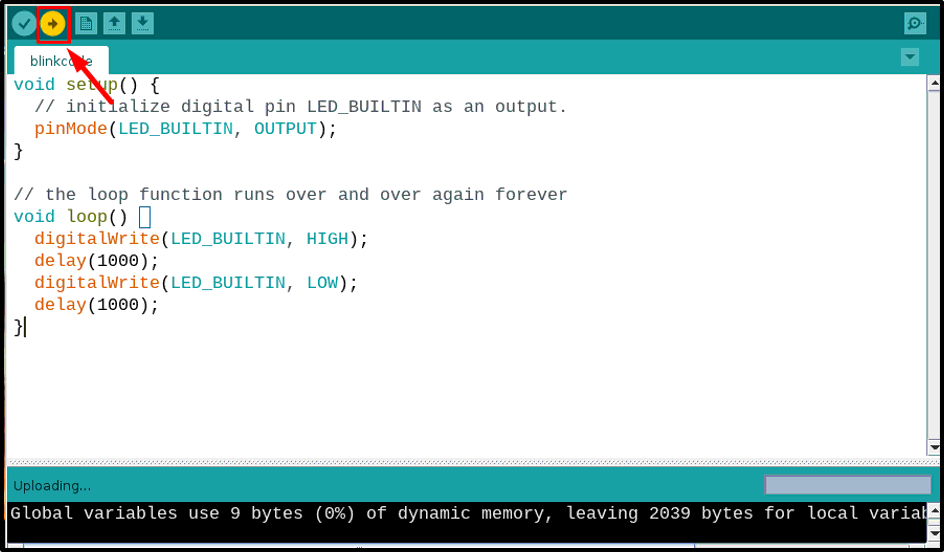
Then, by clicking the “upload” button, you can upload the code.
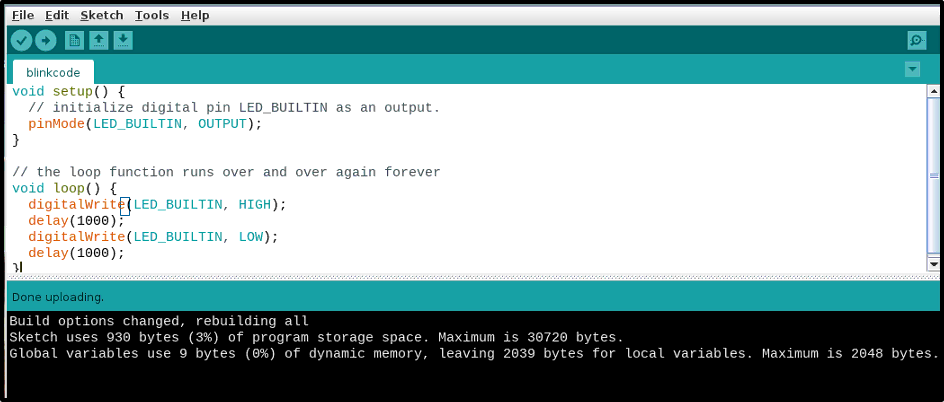
Check that the code was successfully uploaded and that there are no errors.
Step 9: Verifying Through the Circuit
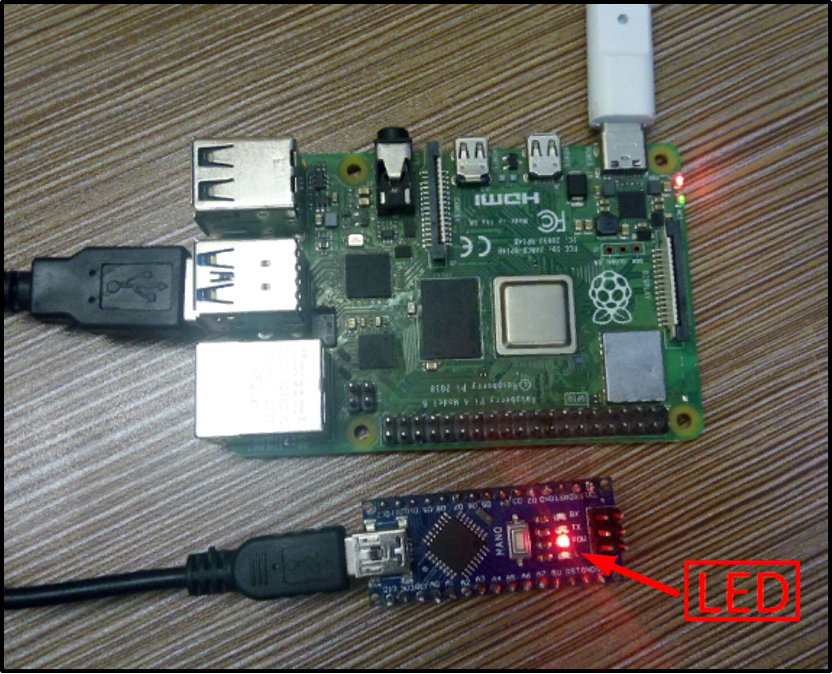
Observe your nano board once the code has been uploaded; it should work the way it was intended. For example, I programmed mine to flash the built-in LED, and it does so correctly:
Read More: Cloudflare Tunnel on Raspberry Pi: Web Server for My Home
Conclusion
Using a mini-USB connection, it is simple to connect Raspberry Pi to Arduino Nano. To compile and upload code to the board, you must install the Arduino IDE from the repository on your Raspberry Pi. You must additionally install Java using the “apt install” command. Select the desired nano board, processor, and port in the Arduino IDE's Tools option to upload the code when everything has been completed. Once all of your decisions have been made properly, you may upload any code using the above-mentioned procedures.
![Official Arduino Starter Kit [K000007] – 12 DIY Projects with Electronic Components & English Projects Book – Original Kit from Italy](https://m.media-amazon.com/images/I/51fPv6DsjQL.jpg)


